Quick Cut Log Cabin Quilt
Presented by Lyn Ennis
A
unique and quick method to cut exact sized logs
for your log cabin quilt.
One cut = one block.
for your log cabin quilt.
One cut = one block.
Lap size quilt is
approximately 60”x60”(including a 6” border).
Block size is 14 ½” (this
includes sashing on two sides)
7 Different Fabrics – 3
lights, 3 dark, and 1 center
(One of the dark fabrics will be your sashing)
Cutting Guide:
Cut
each strip, selvage to selvage and note that you will be cutting 2 different
size strips from each piece of fabric, except the center piece.
WOF, means Width Of Fabric, selvage to selvage.
Log
Width
Fabric
#1 – center
2 ½” x WOF Red
or other dark color
#2
2 ½” x WOF
Light #1
#3
4 ½” x WOF
Light #1
#4
4 ½” x WOF
Dark #1
#5
6
½” x WOF
Dark #1
#6
6 ½” x WOF
Light #2
#7
8 ½” x WOF
Light #2
#8
8 ½” x WOF
Dark #2
#9
10 ½” x WOF
Dark #2
#10
10 ½” x WOF
Light #3
#11
12 ½” x WOF
Light #3
#12
12 ½” x WOF
Dark #3 - Sashing
#13
14 ½” x WOF
Dark #3 – Sashing
You will also need to cut 3
strips for the other 2 sides of sashing at 2 ½” x WOF from Dark #3.
Lay out your chosen fabrics
in the order you will cut them.

As you cut each piece you
should label it. There will be left over fabric, save for another project. I
over estimate how much fabric you will need because when you prewash, dry, and
iron fabric, it shrinks, and it all shrinks different amounts.
Layout for final cut and stitching instructions:
On a cutting mat, layer all strips, right sides up, starting with #13 on the bottom as follows:

Lay the Dark 14 ½” strip (#13 sashing) on your cutting mat with the selvages to your left and right.

On top of that piece, layer
#12 (sashing, 12 ½”) with the selvage on the left end matching #13 selvage and
the raw (cut) edges even at the bottom towards you (across the length of the
strip).
Then layer #11 the same way
and continue until all strips are neatly layered in order, ending up with #1 on
top.

Using a large rotary cutter
with a new (or at least sharp!) blade, square up the left-hand end and crosscut
2 ½” sections.

You should be able to get
approximately sixteen 2 ½” crosscuts.
Each 2 ½” crosscut stack is a complete block- keep it together.
In fact, it would be a good
idea to pin each stack together before you move them.

The logs are stacked in the exact order for piecing.
 Move the cut logs carefully to the sewing area.
  Start piecing with the
Center (Log #1) and
Log #2 as follows:
Stitch #1 to #2 remove from
sewing machine and place in
front of you, with the right
sides up, center log toward you, finger press log #2, then turn the whole piece one quarter turn to the left.
sides up, center log toward you, finger press log #2, then turn the whole piece one quarter turn to the left.
Then add #3, #4, etc., continuing to add Clockwise. Press towards the log you just added, turn the piece
a quarter turn and add the next log.

Notice the cute chocolate in the center?


 You can normally get sixteen
14 ½” blocks of 2” finished logs out of this method. Keeping in mind that you
have also added the sashing to the right side and the bottom.
You can normally get sixteen
14 ½” blocks of 2” finished logs out of this method. Keeping in mind that you
have also added the sashing to the right side and the bottom.
However, I have noticed that
some fabrics are only 42” including the selvage so you may only get 15 blocks!
Check the size of your fabric. I also recommend pre-washing your fabric.
If you desire more blocks of
this size, then repeat the process. You can draft different size logs and
blocks using this method as long as the width of all the logs is the same.

Set blocks 4 to a row, making 4 rows.
 Sew these together and you
will notice that you have sashing around all of your blocks except for the top
and left side.
Sew these together and you
will notice that you have sashing around all of your blocks except for the top
and left side. 
Now add the 2 ½” strips that
you cut from the sashing fabric, you may have to sew two together to make them
long enough to fit down the side.
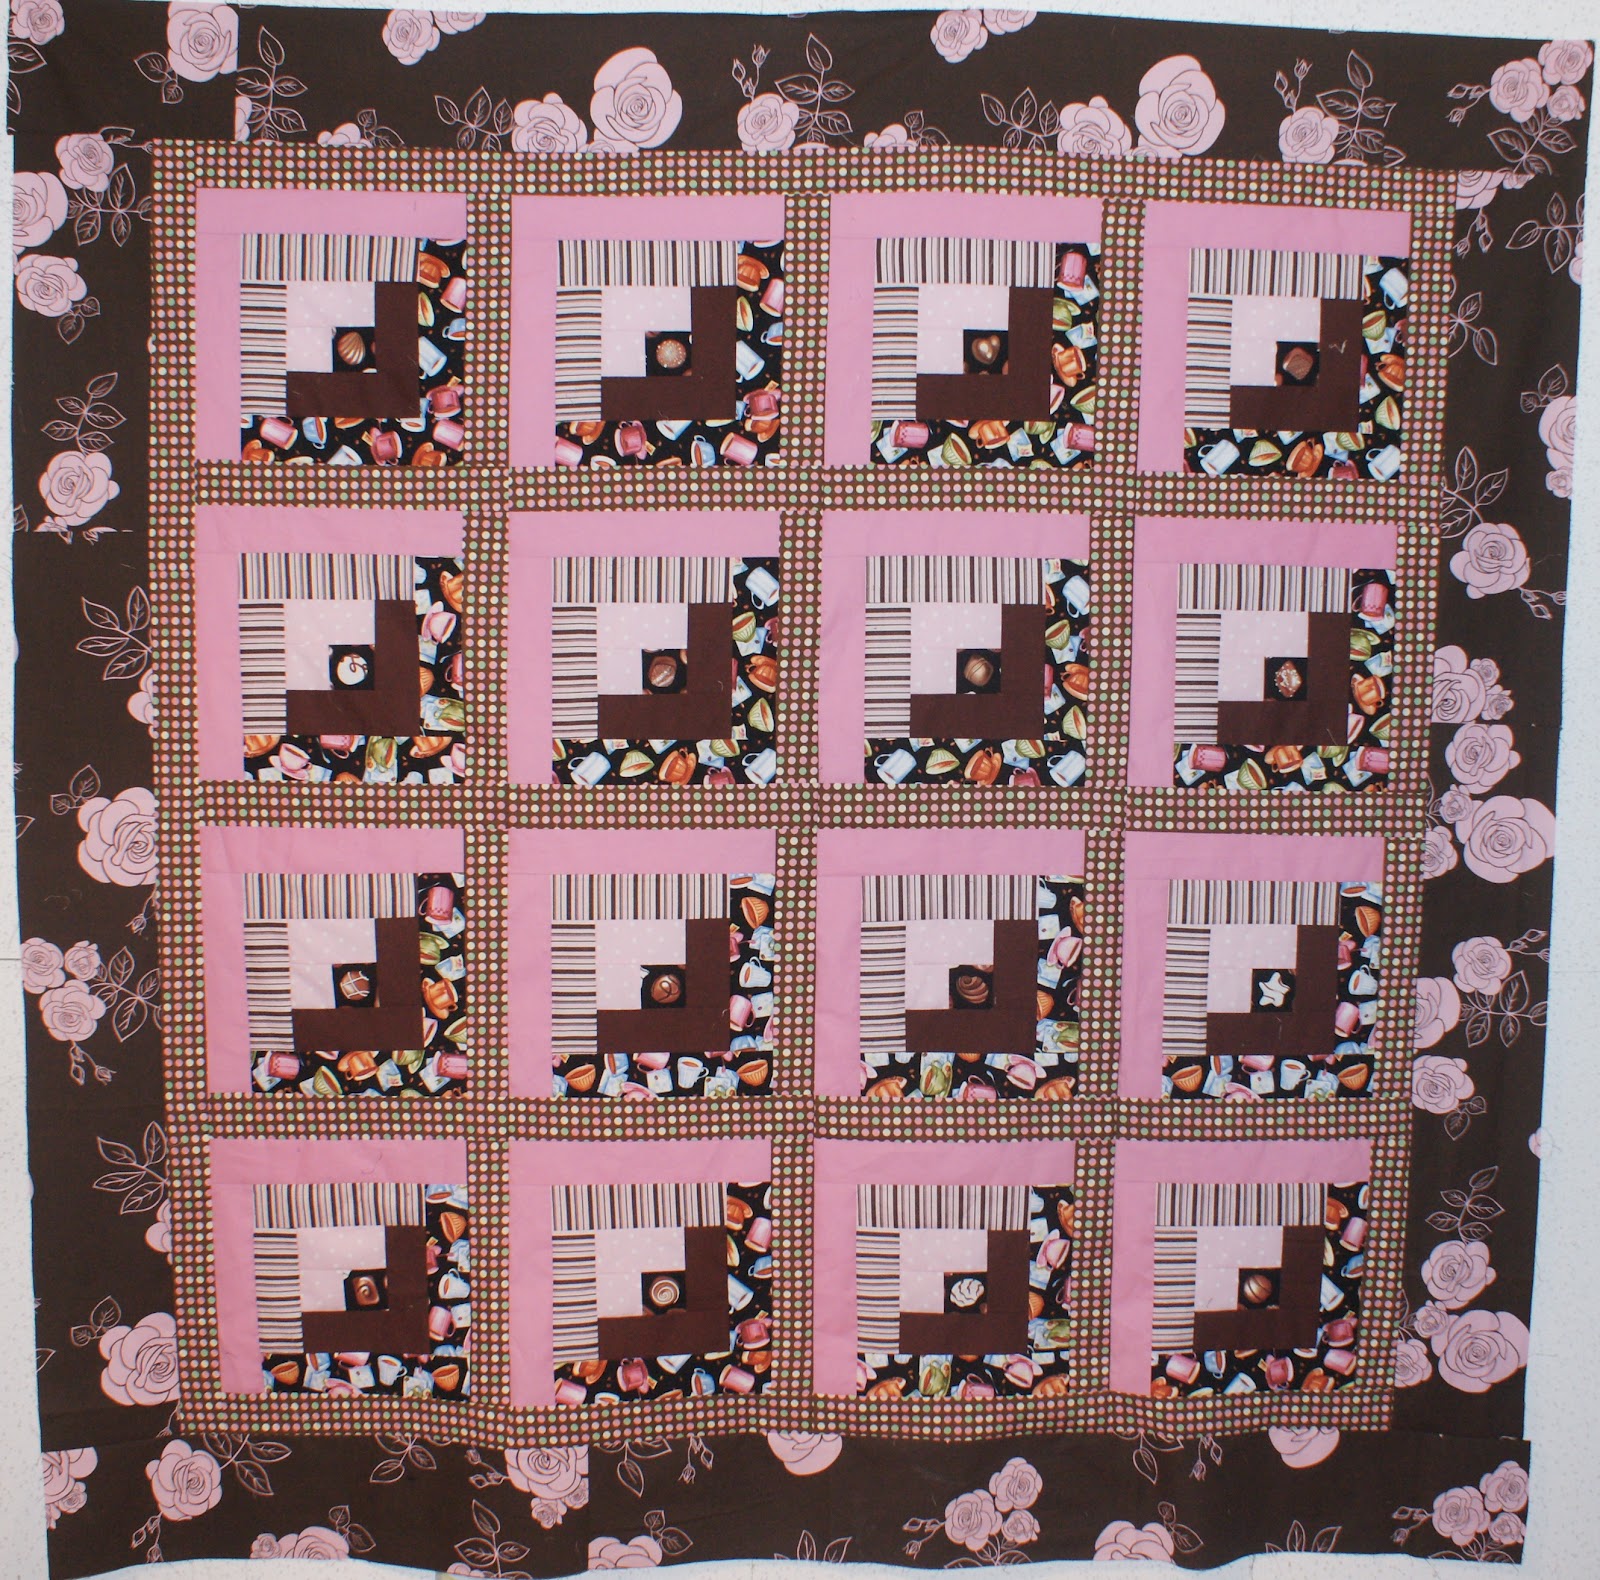
I call this quilt “Coffee and Chocolates in the Rose
Garden”.
I actually, fussy cut all the
center logs so a piece of chocolate ended up in the middle of each.

Add borders as desired.
The fabric requirements allow for a 6 ½” cut border ( 6”
finished). This is optional and you could add several borders to get the
desired size of finished quilt.
Choose a backing and sandwich the batting and quilt all
three layers together, add a binding and you can have a finished quilt in as
little as 10 hours! I rarely work all the way thru a quilt in one day, but if
you had the stamina you could!!!
Hope you enjoyed learning this quick and easy way to cut out
a log cabin quilt. You should always have fun when you are quilting, so if you
have any questions, you know where to find me.
this is a great idea, you might have just inspired me to add log cabin to the to do list. I love quick and easy, it's the only way I can fit quilting into a busy life. Thank you for sharing.
ReplyDelete